This Chocolate Babka recipe was developed after months of careful research. My goal was to produce a classic babka recipe that works every time. Learn to bake tender, delicious homemade chocolate-filled babka with this illustrated step-by-step tutorial.
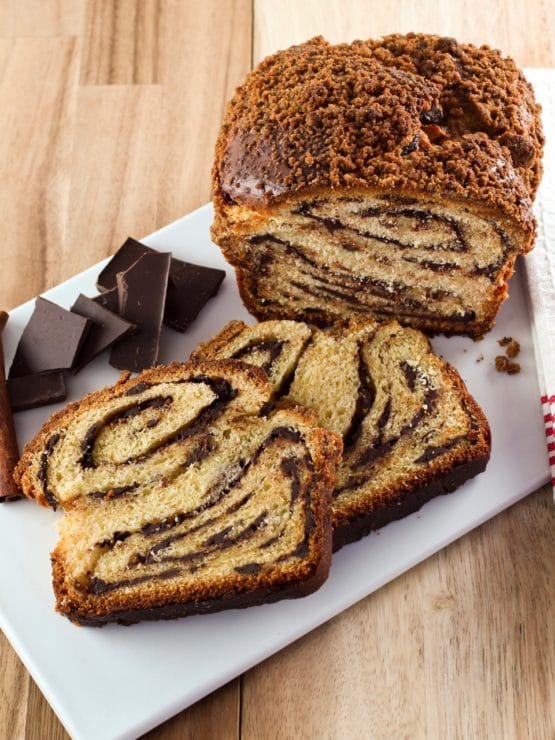
When I started the process of developing this recipe, I realized that just good babka wasn’t enough. It had to be great babka, foolproof and irresistible with perfect texture and spot-on flavor. High standards? Maybe. But babka is labor-intensive. If you’re going to the trouble to make chocolate babka, it’d better be amazing.
Thanks to a gentle nudge by online friend and Kveller editor Tamara Reese, I decided to tackle this whole babka thing. My assistant Ashley and I spent days testing chocolate babka recipes to create our own “ultimate” version. After lots of trial and error– baking is a bit of a science, after all– we incorporated the textures and flavors we loved most. The result is the recipe you see here.
Babka is an Eastern European cake-bread. Modern babka is similar in texture to challah, but slightly more cake-like. The name comes from the Slavic babcia, meaning grandmother, which is closely related to the Yiddish bubbe. The word babka translates to “grandmother’s cake,” inspired by the shape of an old woman’s skirt. Babka was originally baked in fluted Polish baking pans and typically made by grandmothers.
Jewish babka first appeared during the early 1800s when Polish housewives would prepare extra egg challah dough to be filled with cinnamon or jam, then rolled up and baked alongside the Shabbat challah. It was served to hungry children during busy Shabbat preparations or reserved as a special treat. Streusel toppings came along during the mid 1900s.
Here is our recipe for Chocolate Babka. After much consideration, we decided to give it a streusel topping– because, well, why not make a good thing even better?
Recipe Update: I originally launched this recipe in 2015. Since that time I’ve had multiple readers test it with great results. Throughout the years I have made some minor adjustments that help make this Chocolate Babka recipe even more bulletproof. I’ve incorporated those adjustments here, along with pretty new pictures and a few tips from Kelly Jaggers. Enjoy!
Recommended Products:
We are a participant in the Amazon Services LLC Associates Program, an affiliate advertising program designed to provide a means for us to earn fees by linking to Amazon.com and affiliated sites. As an Amazon Associate I earn from qualifying purchases.
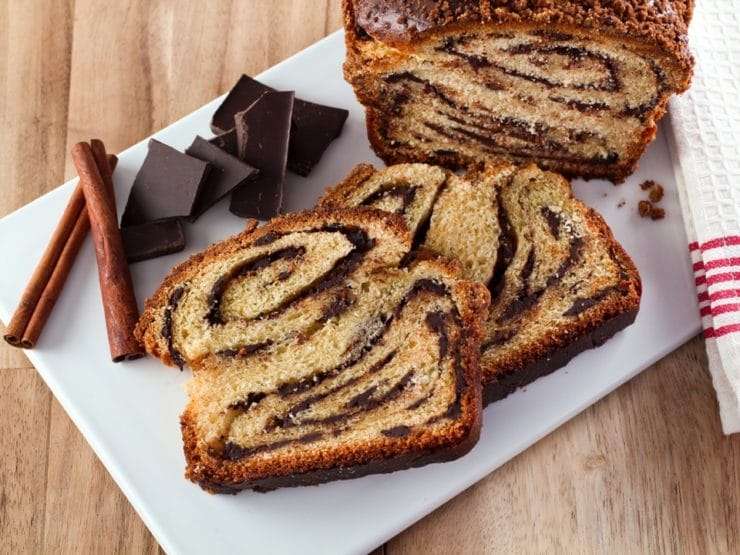
Food Photography and Styling by Kelly Jaggers
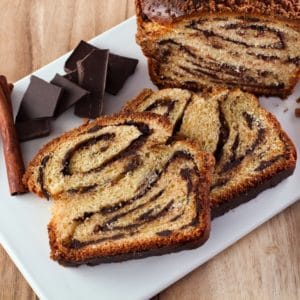
Chocolate Babka
Ingredients
Dough Ingredients
- 1 packet active dry yeast or 2 1/4 tsp
- 2/3 cup whole milk warmed to 110 degrees F, plus 1 additional tbsp for egg wash
- 5 tablespoons unsalted butter at room temperature
- 3 tablespoons granulated sugar plus 1 tsp for yeast
- 1 1/2 tablespoons flavorless cooking oil (grapeseed is an option)
- 1 1/2 teaspoons vanilla extract
- 4 egg yolks reserve 1 egg white for egg wash
- 2 1/2 - 3 1/4 cups all purpose flour (flour amount detailed in instructions below)
- 1 teaspoon kosher salt
Chocolate Filling Ingredients
- 2 cups finely chopped, good quality dark chocolate (two 4 oz. bars of dark chocolate)
- 2 teaspoons ground cinnamon
- 1/3 cup unsalted butter cold
Streusel Ingredients
- 1/4 cup dark brown sugar
- 1/4 cup all purpose flour
- 2 tablespoons unsalted butter cold and cut into small pieces
- 1/4 teaspoon kosher salt
NOTES
Instructions
- To prepare the dough: Start by dissolving the yeast in the warm milk along with 1 tsp sugar. If you do not have a thermometer, the milk should be warm to the touch but not hot. Whisk the yeast into the milk along with 1 tsp sugar to dissolve. Over the next few minutes, the milk/yeast mixture should become foamy as the yeast begins to grow. If it doesn't, this likely means that your yeast has expired or the milk was too hot, causing it to die. Get some fresh yeast and try again, otherwise your babka won't rise... and that would be a major bummer.

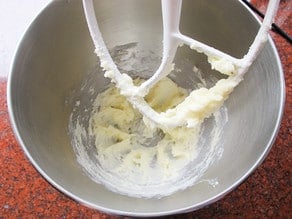
- While the yeast proofs, cream together the butter and sugar in a stand mixer fit with the paddle attachment.

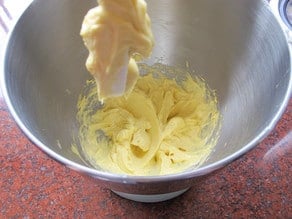
- Once the butter and sugar are well combined, add the oil and vanilla extract and mix well at low speed. Add egg yolks 1 at a time and increase the mixer to high. Beat for an additional 2 minutes.

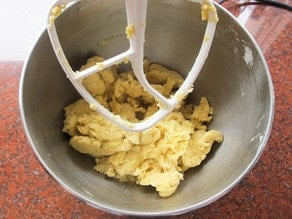
- Turn the mixer back to low speed and add 2 1/2 cups flour and 1 tsp salt, then add the foamy yeast mixture. Be sure to give the yeast mixture a final whisk before adding it in, especially if it is very foamy.

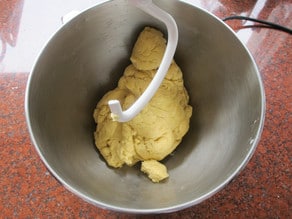
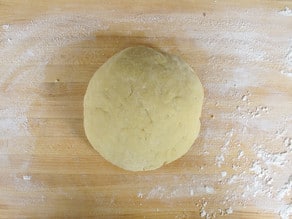
- Mix until just combined, then replace the paddle attachment with the dough hook. Continue to mix, adding 1 tbsp of flour at a time, just until a soft dough forms. The amount of flour you need will vary based on humidity and altitude; best to add flour slowly and check texture as you go. You want a dough that is soft a pliable, not stiff. The dough should be tacky, but not wet or sticky, and shouldn't cling to the skin. Do not walk away during this part, you also want to keep an eye on the dough to make sure that you do not over mix it. It should be easy to form into a smooth ball.

- Once a soft dough forms that can easily be removed from the hook by hand, transfer it to a lightly floured surface and knead several times, or until you have a smooth ball of dough. Do not over-knead.

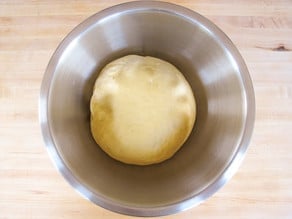
- Place the ball of dough into a greased mixing bowl and cover with plastic wrap. I usually let the dough rise in the refrigerator overnight, but if you prefer you can let it rise at room temperature for 1-2 hours, or until it has just about doubled in size.

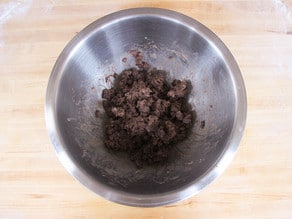
- To prepare the chocolate filling:In a mixing bowl, combine the grated or finely chopped chocolate, cinnamon and butter. Mix with hands until well combined, it should have a chunky texture. Set aside.

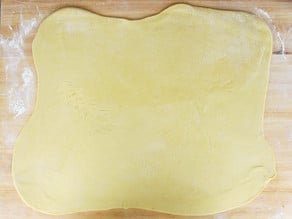
- Remove the dough from the refrigerator and allow to come to room temperature, about 1 hour. Once the dough reaches room temperature, roll it on a lightly floured surface until you have a 14x18 inch rectangle.

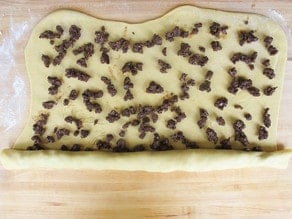
- Evenly sprinkle the chocolate filling over the dough, leaving an even 1-inch border around the edge. Then, starting with the long side, roll the dough into a tight log.

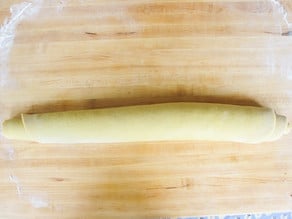
- Roll the log back and forth several times, gently spreading it out until the length of the log is about 20 inches.

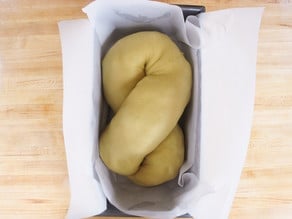
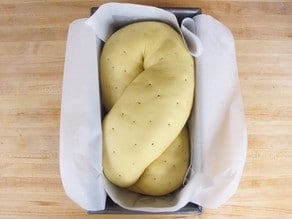
- Twist the dough into a figure 8 and pinch the ends together. Sometimes using a bit of water will help the ends to stick. Line your loaf pan with parchment paper, then lightly spray the parchment with nonstick cooking oil spray. Transfer the dough to the lined loaf pan. Cover the pan with a tea towel, or loosely with plastic wrap, and allow to rise for 1 hour, or until the babka completely fills the pan. It will get pretty big!

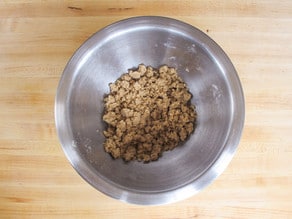
- While the dough is rising, prepare the streusel by combining the ingredients in a mixing bowl until well combined and crumbly.Once the dough has risen, preheat oven to 350 degrees F.

- Using a very thin skewer, poke a few holes into the babka. This allows steam to be released during baking so that you aren't left with very large gaps between the dough and the filling.

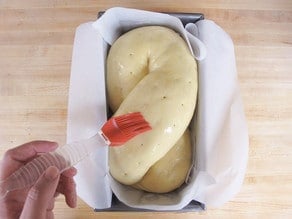
- Brush the babka with an egg wash made from 1 egg white whisked together with 1 tbsp of whole milk.

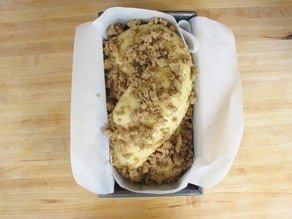
- Sprinkle the streusel over the top of the babka. It will collect more in the crevices, but this is fine. Babka should have a rustic look.Place the pan on a baking sheet and bake for 25 minutes, then turn the pan 180 degrees and cook for an additional 25 to 30 minutes, or until it reaches an internal temperature of 185 degrees F in the thickest center part of the babka. The babka will be golden brown and should have a hollow sound when tapped.

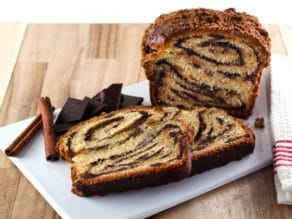
- Allow the babka to cool before slicing. This is truly the hardest part of the whole process, but trust me - cutting into it while it’s still hot will leave you with quite a mess. The filling needs time to set up a bit. Even after cooling it will crumble a bit when you slice it. That's part of the charm. Serve with coffee or tea and enjoy your babka bliss!

Nutrition

tried this recipe?
Let us know in the comments!
Research Sources:
Marks, Gil. Encyclopedia of Jewish Food. Hoboken, NJ: Wiley, 2010. Print.
Other Great Recipe Ideas



First time making Babka, and was told it was spot on. You made it easier with the video and pictures. Thank you so much, I will definitely be making this recipe many times. Happy New Year!
In the Chocolate Filling Ingredients you have 350g finely chopped, good quality dark chocolate and in brackets (two 4oz bars of dark chocolate.
According to Google, 2x4oz equals 226.786g rather than 350g
Hi Sylvia, you are using the metric conversion software built into my recipe plugin, which is not always 100% reliable – it’s not something I have control over, unfortunately. The original recipe says 2 cups finely chopped chocolate (two 4 oz bars). Please go with whatever conversion you feel most comfortable with for 8 oz total dark chocolate.
This will be my first time for making Babka. You have given the dimensions that the dough needs to be rolled out to, but what thickness does the dough need to be in height? Thanks for so many good recipes.
It will be pretty thin. It’s been a while since I’ve tested this, but if memory serves it’s probably between 1/8 and 1/4 inch thick. The dimensions of the rectangle are really the best guide here, and will result in the proper sized twist for the baking pan – so I recommend letting those dimensions lead you.
Oh my, this was a beaut. I was beeming with pride as I took out my first ever babka. And the smell in the house while the babka was baking is now my new favorite “baking scent”! More importantly, it was delicious. Only problem now is my husband is going to want me to make it a lot ;-). Thanks so much for a terrific recipe with video. Being visual, I always appreciate seeing what the texture of yeast should be like.
I was curious, do you mind sharing what chocolate you use when making this babka?
I made your cinnamon babka several months ago, and I thought it was pretty “official” (= as good as the babka I can buy at Zabar’s in NYC.) But this chocolate babka takes it to a whole new level. I made it for a friend’s birthday – at his request; and it was impressive even before it was cut. But more impressive was the taste: so buttery; so chocolately! Incredible! This amazing recipe, as well as the cinnamon babka recipe, now resides in my binder of “go-to” recipes! I will definitely be making this one again, but only when there are lots of people to eat it or when I can send it home with a guest. Otherwise, there’d be another twenty pounds of body weight in my future.
Zabar’s is a high standard! Happy it turned out well for you. 🙂
Yet another amazing recipe. Family loves it. My son claims it is even better than chocolate chip cookies. Thank you, Tori!!!
This is now the third recipe I’ve made of Tori’s and somehow each is better than the next. This babka is by far the best I’ve ever had!! It was so easy to follow her step by step directions and tastes like it should come from the very best bakery! I’m still in shock it was made by me 🙂
I usually make sweet cheese babka every year for Easter. I decided to try a chocolate babka this year since my kids don’t like the traditional cheese filling. This recipe is delicious! Thank you so much for such thorough directions– and the pictures are a huge help. The babka came out perfect and was gobbled up in no time. This recipe is a keeper and our new Easter babka tradition. Thank you!
This was my favorite babka recipe before I went vegan, and I thought somebody might like to know how I’ve successfully adapted it to be vegan (and as such pareve)!
Most of the recipe can be followed exactly. For the dough, substitute whole milk for any nondairy milk. I like soy or oat. Use a stick of vegan margarine (NOT whipped spreads, you need the solid sticks) like Earth Balance instead of real butter. Instead of egg yolks, vigorously whisk 1/4 cup aquafaba (the liquid in a can of beans, preferably something mildly flavored like chickpeas) until it increases in volume and becomes light in color, resembling whisked egg white. In the streusel and filling, substitute more vegan margarine. I don’t miss the eggs and dairy at all, and my non vegan family loves it!
Thank you so much for sharing Halle!
Hello,
I love the idea of making ahead and rising in the fridge for convenience if needed (I did this once with my cheese bread for a brunch), I’m curious as to why it doesn’t need to rise in a warm place. Would doing so affect the bread? (What I do normally is heat my pizza stone at 500 for 10 minutes in the oven, wrap it in a towel, and then put my covered dough on it).
I totally trust your instructions (and we’re really excited to have this Monday morning for our brunch!), I’ve just never made bread without the warm rise and would like to understand– this is how I’ve learned/learn to cook: asking questions from the people who make awesome food!
Thank you!
Becca
Hi Becca! You can definitely do the warm rise here. Refrigerator rise allows you to break up the process so it doesn’t take such a long time to make from start to finish. A slower rise in the fridge can give the dough a slightly tangier flavor due to the yeast fermenting, which I prefer… but it’s not a big deal. 🙂
Thank you so much for explaining! I’m definitely going to do this tonight to prep for tomorrow (by and large I prefer the flavour of pizza/pizza doughs that have the 1-2 day rest to develop the yeast flavour; I’d just never thought of it when it comes to making bread– major duh moment!).
And thank you so much for getting back to me so quickly and for sharing such wonderful recipes! I’m so glad I came across your site!
Cheers,
Becca
Happy to help! Very glad you’re enjoying the site. 🙂
Sorry my rating is slow, it’s so more than 5-stars: Make this! It is amazing!
It took a long time (5 hours start to finish, day of, not prepping dough ahead– about 1.5 hours active), but, I imagine it will go quicker the next time I make it as I won’t be checking the instructions as frequently, and I have a cold kitchen, so rising takes longer than expected for anything with yeast.
I’m serious when I say you should make this– it’s devine! (I wish I could post a pic to show how well it turned out, because it’s beautiful and will make you want to make it!).
Thanks again Tori. It’s now in my family recipe book (under your name of course).
Cheers,
Becca
So glad you liked it Becca!