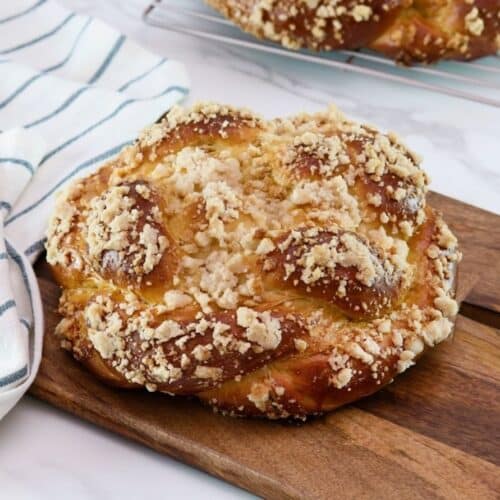
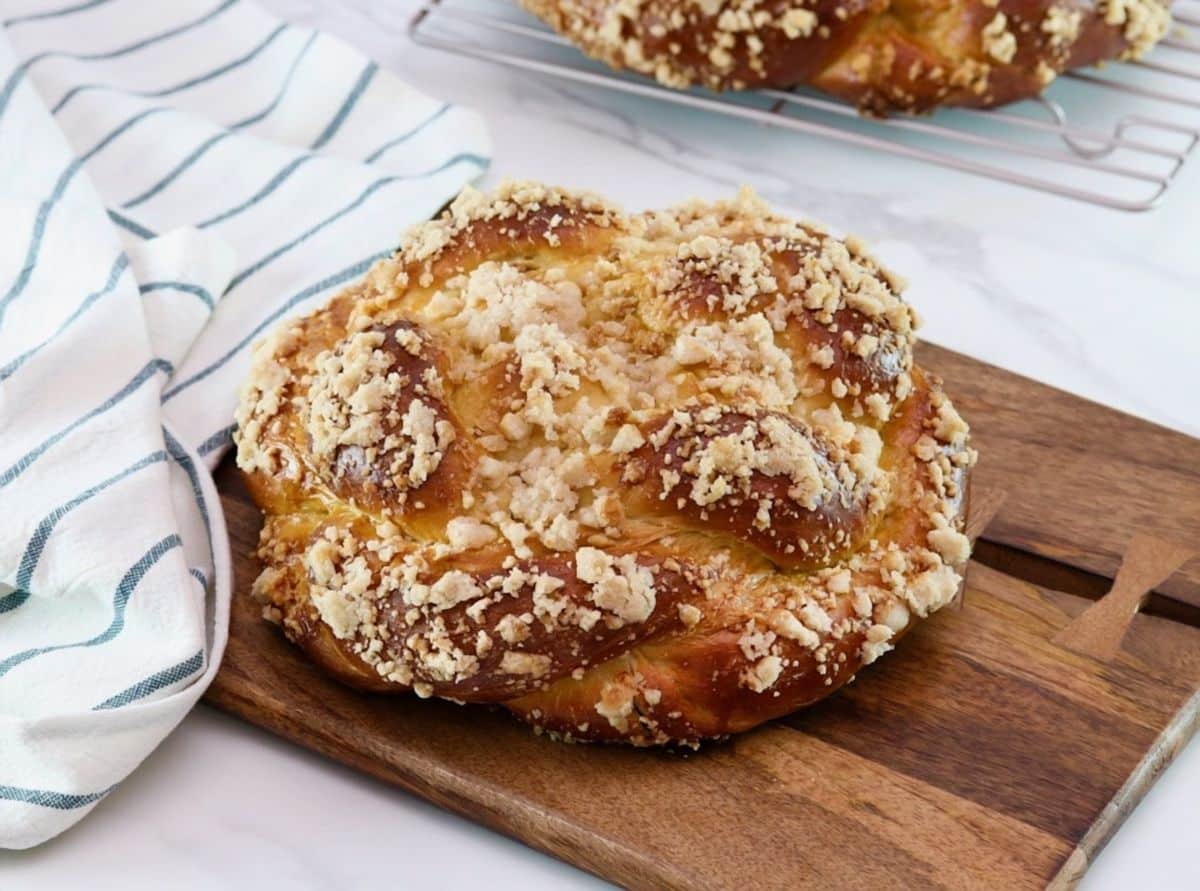
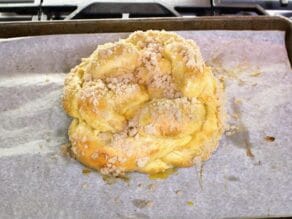
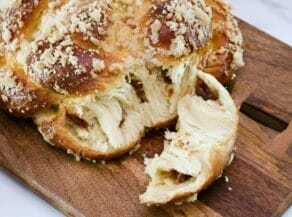
This Cinnamon Date Crumble Challah would be perfect for the High Holidays. It’s a delicious twist on my Apple Honey Challah recipe, a favorite during Rosh Hashanah and Sukkot. This beautiful round challah is sweetened with honey, stuffed with a sweet date filling, and topped with a streusel-like cinnamon crumble. I have included a photo tutorial to help you create a perfectly braided round challah every time.
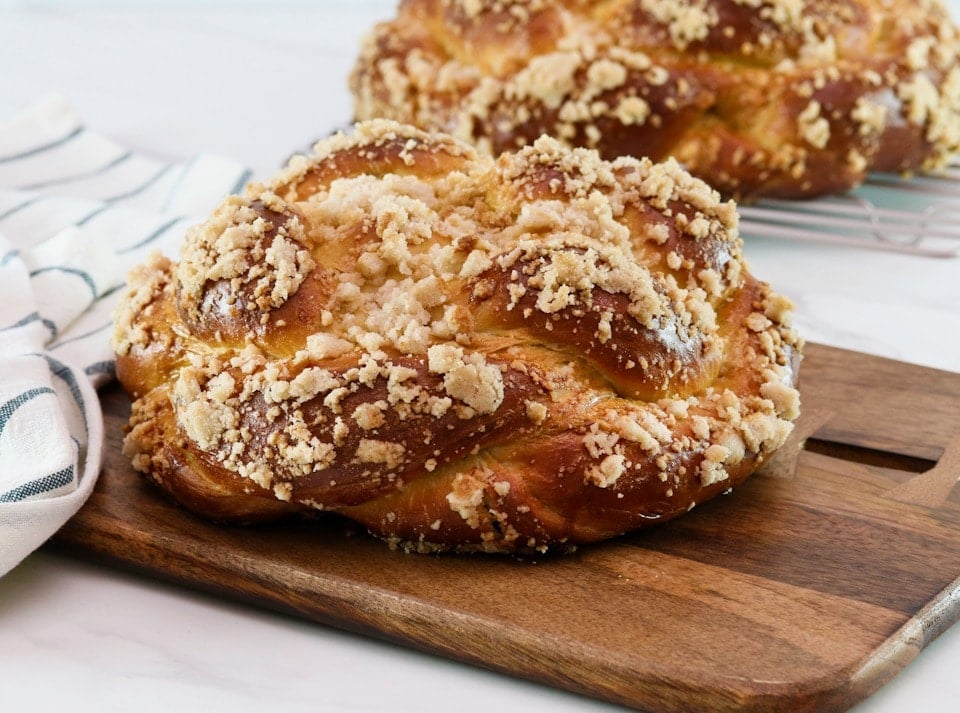
As we near the High Holiday season, I am starting to think of ways to incorporate traditional sweet ingredients into my menu. Apple Honey Challah has become a Rosh Hashanah classic in our home. This year, I wanted to create a new twist on the family favorite. My basic honey challah recipe remains the same. However, I switched out the apple filling for a mixture of dates, brown sugar, vanilla, and cinnamon.
These are warm, lovely flavors that seem to suit the season. In addition, the finished challah is topped with a decadent dairy-free cinnamon crumble, babka-style. It’s the perfect way to ring in a sweet New Year.
Why Round Challah for Rosh Hashanah?
It’s tradition to serve a round braided challah for Rosh Hashanah. Our family tradition says that the circular shape represents the cyclical nature of the year– as one year draws to a close, another year begins, and so the circle continues. Likewise, others say it represents a spiral of upward progress.
There are many ways to make a round challah. Below you will find a detailed photo tutorial that will help you master this braiding technique; you can find other methods here. While it may seem difficult at first, I promise it’s smooth sailing once you get the hang of it. And if this is your first time baking a challah, I would recommend starting with something a little more simple, like my classic challah.
Are Dates Symbolic for Rosh Hashanah?
The date fruit, known in Hebrew as tamar, is symbolic for the holiday. Firstly, they are one of the Seven Species of Israel mentioned in the Torah. Secondly, in Sephardic tradition, they are eaten with the hope that our enemies will not succeed (or be finished). This traditional blessing is based on a Hebrew pun which sounds similar to tamar – “yitamu hataim,” or “may the wicked cease.”
In conclusion, this challah is both delicious and symbolic. What an unexpectedly scrumptious way to ring in the Jewish new year!
Recommended Products:
We are a participant in the Amazon Services LLC Associates Program, an affiliate advertising program designed to provide a means for us to earn fees by linking to Amazon.com and affiliated sites. As an Amazon Associate I earn from qualifying purchases.
Cinnamon Date Crumble Challah
Ingredients
Dough Ingredients
- 1 1/2 cups lukewarm water divided
- 1/4 ounce active dry yeast (1 packet)
- 1 teaspoon sugar
- 1 large egg
- 3 large egg yolks
- 1/2 cup honey
- 2 tablespoons avocado oil
- 2 teaspoon vanilla
- 2 teaspoon salt
- 2 cups bread flour
- 3-4 cups all-purpose flour
Date Filling Ingredients
- 8 ounces pitted dates, chopped (about 2 cups)
- ½ cup water
- 1 tablespoon dark brown sugar
- 2 teaspoons vanilla bean paste
- 1 teaspoon cinnamon
Egg Wash Ingredients
- 1 large egg
- 1 tablespoon cold water
- 1/2 teaspoon salt
Crumble Ingredients
- ¼ cup all-purpose flour
- ¼ cup sugar
- 2 tablespoons avocado oil
- 1/8 teaspoon cinnamon
NOTES
Instructions
- Pour 1/2 cup of the lukewarm water (about 110 degrees) into a large mixing bowl. Add yeast and sugar to the bowl. Whisk to dissolve. Wait 10 minutes for the yeast to become bubbly and foamy.

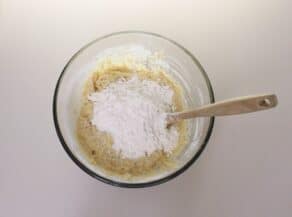
- Add remaining 1 cup lukewarm water to the bowl along with the egg, egg yolks, honey, avocado oil, vanilla, and salt. Use a whisk to thoroughly blend the ingredients together, then stir in yeast mixture.To the liquid mixture add 2 cups of bread flour and 2 cups all-purpose flour, stirring with a large spoon until mixture becomes too thick to stir, then switch to kneading in the bowl with your hands.

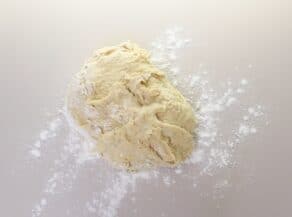
- Continue to add all-purpose flour ½ cup at a time and knead the dough until it’s smooth, elastic, and not sticky. The amount of flour you will need will vary depending on many factors such as humidity and the time of year, so only add enough flour for the dough to form a ball and not stick to your fingers when touched. Turn the dough out onto a smooth surface lightly dusted with flour and knead a few more times before shaping dough into a ball.

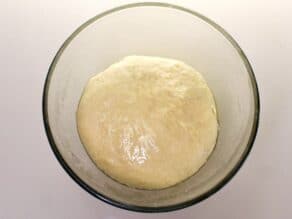
- Wash out the mixing bowl then lightly grease with avocado oil. Place dough ball in top side down then flip to coat with oil. Cover the bowl with a clean, damp kitchen towel. Place the bowl in a warm, draft-free spot in your kitchen. Let the dough rise for 1 hour.

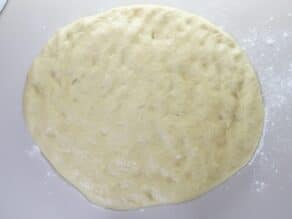
- After an hour transfer dough to a lightly floured surface and press the dough with your palm to flatten and to remove air pockets. Shape it back into a ball and place it back inside the bowl. Cover and let rise for 1 hour.

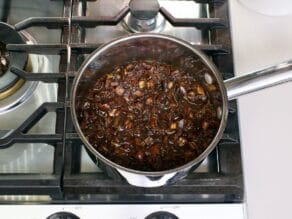
- During this final rise prepare the date filling.In a medium saucepan add chopped dates, water, sugar, vanilla bean paste, and cinnamon. Bring to a boil, stirring constantly, then reduce to a simmer and cook for 3-5 minutes, or until the water has been absorbed by the dates and the mixture is thick.

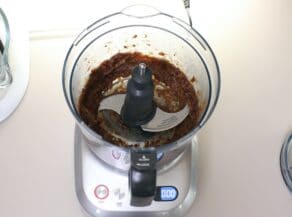
- Remove from heat and cool for 10 minutes, then transfer date mixture to a food processor and process until the mixture is smooth and thick, about 45-60 seconds. Transfer to a bowl and set aside.

- When the dough has doubled in bulk transfer to a work surface lightly dusted with flour. Press the dough with your palm to remove any large air bubbles. You will have enough dough for two medium-sized challot (challahs).

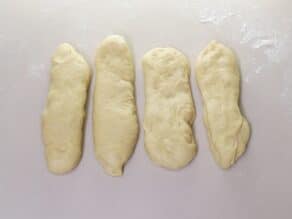
- Divide the dough into two equal pieces approximately 24 ounces each. Keep one half on the work surface, and return the other to the bowl and cover with a towel. Cut the dough into four equal portions about 6 ounces each.

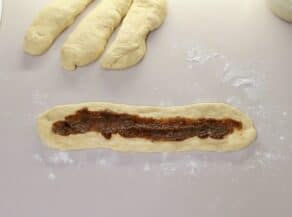
- Take one of the four portions and stretch it with your fingers into a rough rectangle, about 12 inches long, 3 inches wide, and thick enough to fully encase the date filling. Beware of thin spots. You can use a rolling pin if that makes the process easier.Spread 1/8 of the date mixture over the center of the dough, leaving at least 1/2 inch border along the outer edge of the dough.

- Gently roll the upper edge of the rectangle down to the lower edge and pinch to seal, creating a snake-like roll of dough stuffed with date filling. This is the beginning of your strand.Gently and carefully roll the stuffed strand till it becomes smooth, using gentle pressure with your hands on the center of the strand, pulling outward as you roll. Re-flour the surface as needed to keep your dough from sticking.

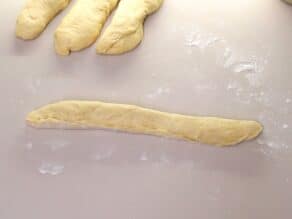
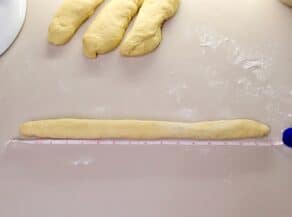
- Taper the ends of the strand by clasping between both palms and rolling. At the end of the rolling process, your strand should be about 16 to 18 inches long with tapered ends. Once your date filled strand has been rolled, repeat the process with the remaining 3 pieces of dough, making sure that they are even in length with the first strand. In the end, you’ll have 4 date filled strands.

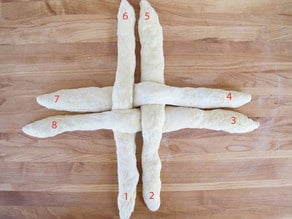
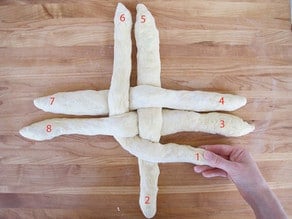
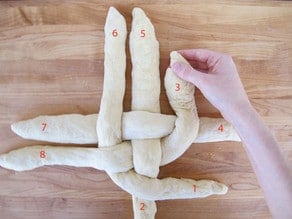
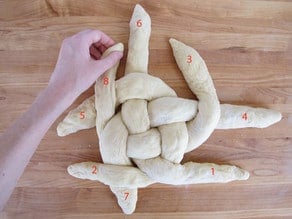
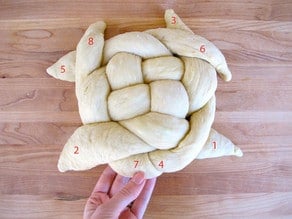
- Your filled strands are ready to braid. There are a few different ways to braid 4 strands into a challah. This recipe will guide you through one method for braiding a round four strand challah. For other braiding methods, click here. Place two strands in the center of a smooth surface, running parallel top to bottom. Place the third strand across the two strands, going under the left strand and over the right. Place the fourth strand directly below the third strand, going over the left strand and under the right. You will have something similar to a tic-tac-toe board pattern, with the center of the board being a very small square and 8 “legs” sticking out from that center. Keep the center as tight as possible… you’ll be braiding from the center. I have numbered the strand ends in the following diagram to make the braiding process easier.

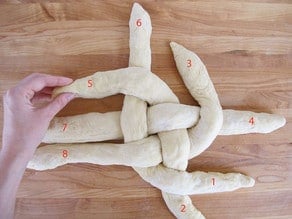
- Take strand 1 and cross it over strand 2.

- Take strand 3 and cross it over strand 4.

- Take strand 5 and cross it over strand 6.

- Take strand 7 and cross it over strand 8.

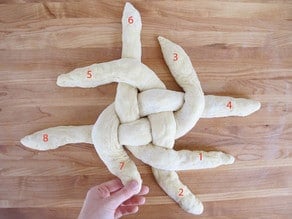
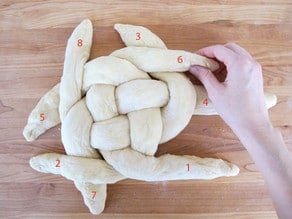
- Take strand 2 and cross it back the opposite way, over strand 7.

- Take strand 8 and cross it over strand 5.

- Take strand 6 and cross it over strand 3.

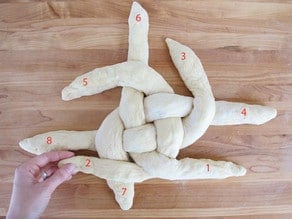
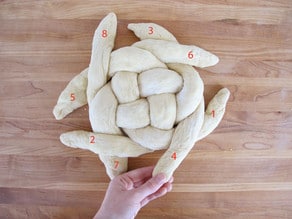
- Take strand 4 and cross it over strand 1.

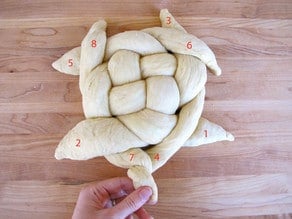
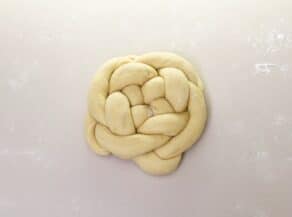
- Take strand 7 and twist it with strand 4.

- Tuck the twisted ends under the challah.

- Repeat this process with the remaining loose ends—twist and tuck 1 with 6, then 3 and 8, then 5 and 2. When all of the loose ends are twisted under, gently plump the challah into a nice, even round shape.

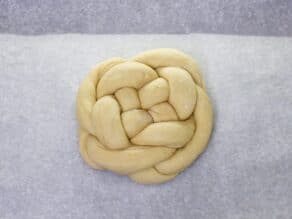
- After the round has been braided, place it on a baking sheet lined with parchment paper. Preheat the oven to 350 degrees F. Let the braid rise 30 to 45 minutes longer covered with a damp towel. You’ll know the dough is ready to bake when you press your finger into the dough and the indentation stays, rather than bouncing back. While this challah rises, you can braid the other half of the dough in the same way, or you might choose a different braid for your second challah. Your second challah will rise as the first one bakes. Prepare your egg wash by beating the egg, salt and water until smooth. Use a pastry brush to brush a thin layer of the mixture onto the visible surface of your challah. Reserve the leftover egg wash.

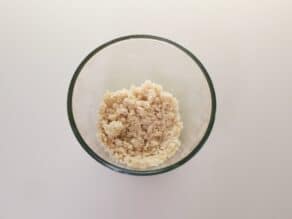
- In a small bowl combine ingredients for the crumble and mix until the mixture is well combined and looks like very damp sand with large clumps. Sprinkle half of this mixture over the challah. You may need to gently press it onto the sides of the bread to help it stick.

- Each challah needs to bake for about 45 minutes total, but to get the best result the baking should be done in stages. First, set your timer to 20 minutes and put your challah in the oven. After 20 minutes, take the challah out of the oven and coat the grooves of the braid with another thin layer of egg wash. These areas tend to expand during baking, exposing dough that will turn white unless they are coated with egg wash. Turn the challah around, so the opposite side faces front, and put it back into the oven. Turning it will help your challah brown evenly—the back of the oven is usually hotter than the front.

- The challah will need to bake for about 20 minutes longer. For this last part of the baking process, keep an eye on your challah—it may be browning faster than it's baking. Once the challah is browned to your liking, take it out and tent it with foil, then place it back in the oven. Remove the foil for the last 2 minutes of baking time.Take the challah out of the oven. Test the bread for doneness by turning it over and tapping on the bottom of the loaf—if it makes a hollow sound, and it's golden brown all the way across with a golden brown crumble, it’s done. You can also stick an instant read thermometer in the thickest part of the challah-- when it reads 190, it is baked all the way through. Let challah cool completely on a wire cooling rack before serving. Bake the second challah in the same way.

Hi Tori, Shana tova! We’ve made this bread for a few years now (delish!) and this year when making it, I noticed in step 2 it says to combine canola oil with the other bread ingredients but no canola oil is listed in the bread ingredient list. Now I’m wondering if I’ve been missing an ingredient all along? Thanks!
Hi Dina! I switched over to avocado oil for health reasons, and have been transitioning my recipes to it as well, slowly but surely. In this recipe I updated the ingredient list, but forgot to update the instructions. I just corrected it. Thank you for the heads up!
Excellent crowd-pleaser, really a thriller. Making second year in a row for Rosh Hashana
The date streusel challah was wonderful. My entire family is asking me to make it again. They liked it better than the apple stuffed one I have made in the past. It was like a babka
Delicious
So happy to hear that!
This was delicious! I used date sugar. I think it just bumped your apple challah into 2d place!
Hi Tori! I hope that you see this soon because I’d like to make this for Rosh HaShana this weekend! I want to make the dough for this but use half for the apple challah and the other for the date crumble. However, the amount of honey is different in each recipe. The apple one says 3/4 cup but the date says 1/2 cup. Which amount should I use?
The date dough isn’t quite as sweet because it includes a streusel topping, which adds sweetness. I would go ahead and use 3/4 cup, with the understanding that the date one will be a little sweeter and more dessert-like. For Rosh Hashanah, that’s perfectly fine! And it’s not a big difference in terms of sweetness. Enjoy!
I’m wondering if I can use the same dough to make one date and one apple challah? I noticed that the two recipes are similar except for the amount of honey. Which dough do you suggest I use? Thank you!
Yes! I would use 3/4 cup honey in this case. Enjoy!
Dear Tori, I want to make this and I have a question. Why do you use part AP flour instead of all bread flour? I usually use bread flour because I like the stretchy element it gives challah. I welcome and appreciated your thoughts.
It helps to give the bread a nice structure without becoming chewy. All bread flour has the potential to make it a bit too chewy. The combination helps to make what is inherently a rich bread more fluffy without becoming crusty.